Showing posts with label decor. Show all posts

Friday, January 20, 2012

DIY Rugs

Well, I've been accumulating a ton of old clothes that aren't even up to Goodwill's standards so my stash has been building downstairs of t-shirts, dress shirts, and jeans.  One prime spot for a rug would be for in Colby's room since the dog can't go in there the room stays much cleaner.  My favorite rug is this one from xoelle.com.  She cut all of her t-shirts into strips and then dyed them a dark gray.  I think I'd like to dye the shirts all different shades of blue, green, and gray so it gives the rug a watery appearance. Here's a few of the best ones I've seen.

Picture found here at xoelle.com

Lovely braids.  Found here at craftpassion.com

  
Loving the different colors, found here at creativejewishmom.com

I love these braided rugs-the colors are great.  Found here at moddish.blog.com
I'm not so into the pink but this website has good directions. 

Tuesday, January 17, 2012

Accessories for the Nursery

Well, this should be the last official post about baby room decor, until I actually get my tush in gear and make something.  I'm thinking making a baby lounger would be awesome, although it will probably just end up being a golden retriever bed.  Once I pick a color scheme and just go for it I think the room will come together. 

Good Old Martha, can you ever let us down?  Oh that's right you've been to prison.  Link here.

Cute little lounger with directions here.

What a cute little rug.  Link here. 

So cute, but Colby will pull these off once he can reach.  Link here.

To measure...here

Monday, January 16, 2012

Yes, yes more baby rooms

Okay, I apologize for all of the baby rooms, I'm sure those of you that are reading this, yes I know readership is limited (hello Maggie, Chelsea, and Tyler) I will soon be getting back to actually doing things, but for now here are more inspirations for Colby's room.  By the time I get his room done he'll be a teenager and probably won't let me in to paint a cute little bunny mural. 

This is probably something more doable for Colby's room.  Link here.


Maybe just some stripes?  Link here.


This is a super stylish room, a girl can dream, right?  Link here.


Loving the tent! Here's the link.

Friday, January 13, 2012

Wall Murals

Well, I'm still on this decorating kick for Colby's room and pretty soon I'm just going to have to start into it and let it work itself out, but for now I'm trying to accumulate all of my options before I decide.  So far he's got all different wood tone furniture and light green walls-other than that it is a blank slate.  So here's some murals I'm debating about:


This is one of my favorites-a bit retro it came from here.


Perfect for Minnesota, eh?  Came from here.


I love this book, but monsters may be a bit too scary for Colby...it came from here


Or possibly I should go for something more simple.  From here


Monday, January 9, 2012

DIY Card Wreath


Well, I realize it's a bit late, but I made another card wreath to hold all of our lovely Christmas cards from our friends.  This time I decided to make it a bit heftier with some burlap and ribbon.  I used two embroiderly hoops of different sizes and simply tied on strips of burlap and ribbon.  The clothespins just wiggle in between the pieces so they aren't glued on or fastened in anyway which makes it more versatile to fit whatever size of cards you receive.  Now that I have them all done I imagine the clothespins could be placed on the back of the wreath so they would be hidden even more-oh the possibilities.  Happy Crafting!


Tuesday, December 6, 2011

DIY Christmas Wreaths

Well, I have been in such a creative funk lately.  I think with the snow storms I have this urge to just wrap myself in a blanket and throw in a movie, but alas, with a ten month old that only happens after eight o'clock, so I have been spending my time chasing him around and preventing him from eating cords, dog food, and leaves.  What fun!   I have so many project ideas to do and I just need to start the sewing machine up.  For now though, I'll just add to my long list of projects to do.

Tutorial Here


Tutorial Here
Tutorial Here
Tutorial Here
Tutorial Here

Tuesday, November 29, 2011

Painted Rugs

Shannonberrey.com
Along with my desire to paint my curtains, I've been considering painting a rug for Colby's room or the laundry room.  I've seen some pretty awesome ones, but it seems that they aren't very durable with dog claws.  Most I have seen are painted just using latex paint either free form or stenciling and then they sand down the paint so it softens up more.  Hopefully I can find a plain rug on sale at IKEA or Target soon.    Here are some of my inspirations:

The Chevron Stripes
http://www.thehouseofsmiths.com

  Gradients

Burkelodge.blogspot.com

Numbers
designsponge.com

Stamped Rug
http://myhandsmadeit.com


Tuesday, November 1, 2011

Painted Curtain Ideas

I've been thinking about painting our bedroom curtains for quite a while.  Curtains have always bored me and usually they don't thrill me.  Our room is slate blue so I think I may go for a orange or burnt orange on the tan curtains.  Basically you could go as crazy as you wanted from just chevron stripes to hand painted animals.  Soon I will get around to this since it looks like a pretty simple project. Click on the pictures to go to the origin of the photos and tutorials if there are some.

 
Graceful gray and white stripes

Beautiful gray and white stenciled curtain
Painted Hummingbird
Free hand orange on white curtains
These may be my favorite-and most intense-white stencil on gray curtain

Wednesday, October 12, 2011

Homemade High Chair Cover

The high chair the most of our baby gear was second hand.  My husband's coworker graciously gave us a crib, high chair, and booster seat.  Unfortunately the chair was covered in cracking vinyl so I finally got around to refinishing it since we are using it a few times a day now. I had a bunch of PUL (water proof fabric) left over from my attempts to make diaper covers so I was set. 


 It was really a pretty simple job.  It was just one solid piece so I traced a front and back, cut it out, sewed it together and stuffed it with the padding from the old one.  I then did some decorative stitching to keep the foam padding in place and wallah, it was done. 

Monday, October 3, 2011

Colors for the House I Love


I'm loving warm yellow and oranges right now complimented with deep blues with lots of patterns.  As I'm getting older I'm realizing that I'm starting to turn into my mother-well, I never call her 'mother' and I could never turn into her-but my house is becoming more like my home growing up.  My mom always goes thrifting and to auctions so she has accumulated a massive amount of treasures. Every nook and cranny is filled with something that draws the eye in.  For the past few years I think I've been trying to be far too minimalist which translates into boring-so my goal is to fill my home with objects I love and interest me.


Thursday, September 22, 2011

Side Cabinet Redo Update

Here's an update of the cabinet that my husband helped me redo.  I originally bought the cabinet for two dollars at a garage sale.  At the time I wasn't sure what I was going to do with it, but it had really good bones and was sturdy.  We spray painted it paprika, made a drawer, and bought new knobs...needless to say it is worth a bit more than two dollars now, but still rustic.  If only I had another piece of furniture to refinish, I must go garage saling soon. 


Friday, May 27, 2011

How to Make Storage Boxes

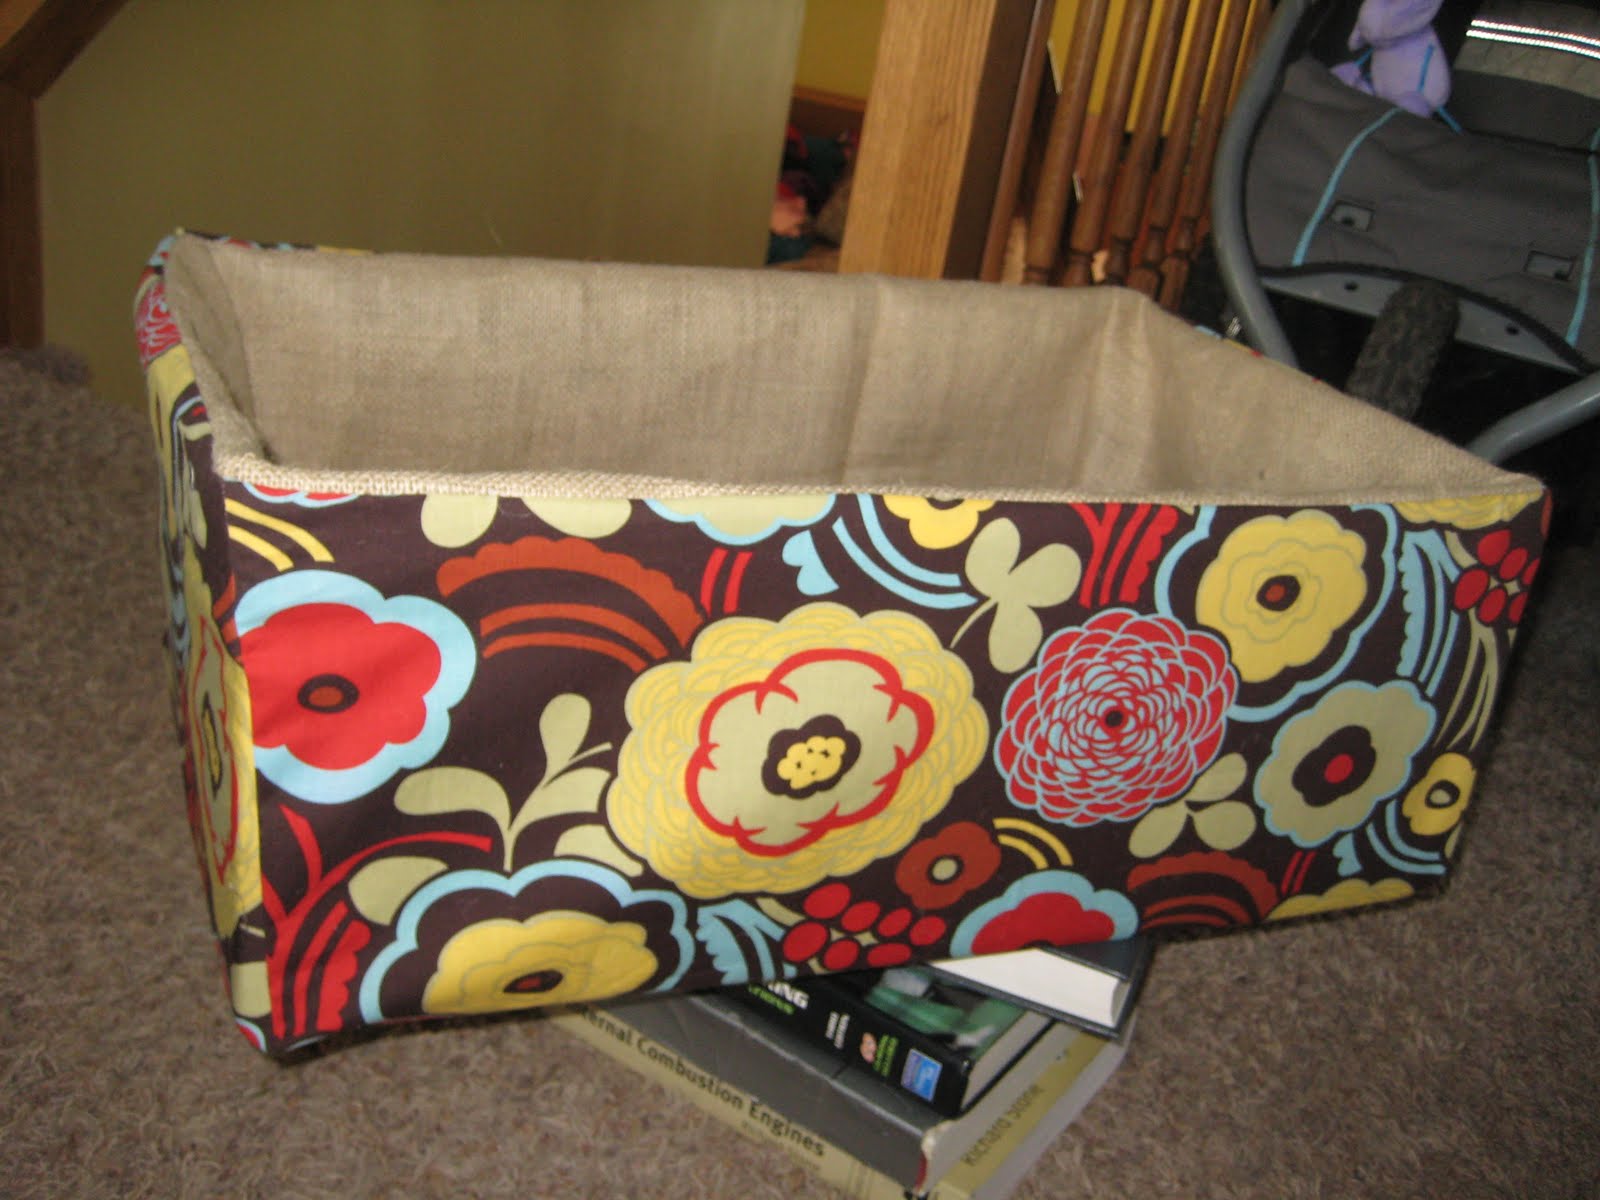
As I mentioned earlier we went to IKEA and purchased a large entertainment center which had cubbies that needed baskets.  I went to Target to try and find some big baskets that would fit, but there weren't any that were big enough, and I'm not willing to run out to IKEA just yet as I'm still in a bit of a shock.  I then set out to make some customized baskets/boxes that would also add some color and pizazz.  I didn't have to buy anything so these boxes were virtually free.  Here's the final product:
What you need:
  • Cardboard
  • Wide Tape
  • Exacto Knife
  • Measuring device or square
  • Fabric for inside and out
  • Thread
  • Needle
  • Sewing Machine
Step 1:  Measure how big you want your box to be and cut out sizes from cardboard.

Step 2:  Tape the card board together to the base and use as a pattern to cut out the fabric. I added about 1/2 an inch for my seam allowance.  Cut out the inside and outside fabric for the box.

Step 3:  Sew edges of fabric together to form the shape of a box.  Then tape together box and put fabric on.  At this point I noted if I needed to make the fabric more snug to the box and took in the seams.  (To do this put the fabric on the box inside out and then pin the seams and take off and sew)


Step 4:  Place both the inside and outer fabrics on box.  Pin the tops together but leave one side open so you can remove the fabric from the box and sew with machine. 


Step 5:  Once you have sewn the two pieces together place back on box right side out.  Using clips I held the fabric where I wanted it and used an invisible stitch and sewed the last seam. 


 Now you have a great fabric box.  I'm planning on using some modge podge to make the inside of my box a bit sturdier.  On the next box I am making I used a double layer of cardboard to make it more sturdy.