Friday, December 23, 2011

Homemade Mozzerella Sticks

Mine didn't nearly look this good these are from tasteofhome.com.  Recipe found here

I ran across this recipe for Mozzarella Sticks quite a while ago and saved it in my bookmarks.  I finally got the chance to use it yesterday when I ventured out to the grocery store solo-I'm used to going with Colby everywhere-so I'm sure I narrated the whole grocery shopping experience out loud like I normally do: "Okay, now let's get some potatoes, do you see the potatoes?" I'm sure I took the cake for the craziest shopper in the store even with all of the holiday traffic.  I had a leisurely shop and discovered just above the carrots there's a tofu section, above the asparagus are egg roll wrappers, and there's a whole isle dedicated to Mexican and Asian delicacies.  So, I picked up some egg roll wrappers, tofu (I've never had it before), and some garlic pepper sauce from the Asian isle (I hope this is politically correct).   I remember my mom making homemade egg rolls when we were little, so I'm looking forward to trying that as well, since the mozzerella sticks weren't amazing. 


So here's mine, I know I know, not that delicious looking, and a fancy camera wouldn't have made them look any better...so basically I just took an egg roll wrapper, placed a hunk of cheese in it and rolled them up, sealing the edges with a bit of water.  I then fried them up in a few tablespoons of veggie oil for about 8 minutes total.  They weren't bad, but I definitely wouldn't say they were finger licking good.  Better luck next time I suppose. 

Wednesday, December 21, 2011

Mittens Made from Sweaters

Pic from Mossymossy.com and tutorial can be found here.
A few weeks ago I was at the dentist office waiting in the reception area for my appointment.  I over heard my dental assistant going chatting on and on with a woman patient about the mittens she makes out of old sweaters.  The gal was selling her mittens to the office employees and she mentioned how ticked she was that a gal from a church bought a pair, copied them, and then started the whole church making them for fundraising.  The only thought in my head was, "Man, I wish I could just get a glimpse of her mittens so I could make some too."  Well, I never did catch a glance, so I have to resort to the internet.  I found this great tutorial on Mossymossy.com which looks like a really fun blog to peruse through.  The directions look very clear to follow, but I just am waiting for an opportunity to run out to Goodwill and pick up some wool sweaters.  Good Luck if you make these.

Monday, December 19, 2011

Crème-de-menthe Brownie Recipe

This weekend we had a few Christmas parties to go to so my mother in law and I made these minty brownies from a recipe my husband got from a co worker.  They are a bit more intensive than plain brownies but they are far more decadent with a buttery creamy  mint layer and chocolate glaze.  Enjoy.


Crème-de-menthe Brownies
Make brownies as directed on the box except add 1 cup semi-sweet chocolate chips to the batter before baking. Bake as directed on the box and cool. Do not cut.

Crème-de-menthe layer:
Beat 1/2 cup room-temperature butter or margarine, 2 cups confectioner's (powdered) sugar and 3 tablespoons green crème-de-menthe syrup (found by the ice-cream toppings in the grocery store) in a large bowl with electric mixer until smooth. Spread over brownies.

Chocolate glaze:
Stir 1 cup semi-sweet chocolate chips and 6 tablespoons butter or margarine in a saucepan over low heat until melted (I microwave for 1 minute, stir and microwave for 10 second intervals until melted). Cool and then pour over the crème-de-menthe layer (spread evenly). Before glaze sets, sprinkle with coarsely chopped mint wafers (I use chopped Andies mint chocolate candy). Refrigerate until chocolate glaze is set but not hard, and then cut (it's easier to cut this way). Bars are best if kept refrigerated.

Note: I have also sprinkled crushed candy canes on the glaze instead of the chopped mint candy, which makes for a festive holiday treat.

Recipe from R. Larsen

Friday, December 16, 2011

Pecan Turtles


Yum.  I decided to make pecan turtles to share at some Christmas parties we are going this weekend.  We made some this past weekend when I visited my sister and they were so delicious.  They are simple to make.  Take some whole pecans and make a row of three or so on a greased cookie sheet and then place a caramel square on top. Place in oven for 5-7 minutes until melted in an oven at 350 degrees.  When you take them out of the oven just place a piece of chocolate bar on top and it will melt.  After it sits for a bit the chocolate can be smoothed out with a spoon. 

Thursday, December 15, 2011

Succulents


Well I have been fortunate enough to plant sit for my  mother in law this winter when they visit Arizona instead of living it up in the snowy tundra.  I absolutely love this bowl of various succulents, I'm looking forward to snagging a few cuttings to make my own little garden.  I've found some really clever ideas for succulents...until then here's some pictures of the amazingly big plants.


Wednesday, December 14, 2011

Silly Picture

We were up all night last night.  Looks like an ear infection again...we're off to the doctor this afternoon and hopefully he can get some relief.  Until then keep Merry.


Tuesday, December 13, 2011

Homemade Diapers


It's about that time again to make some more diapers.  I'm working on making a diaper stash for one of my friends I used to live with in college.  I'm finding it harder to do than I thought it would be because I'm more concerned about the diapers actually looking pretty and not just functional.  Of course we just visited back home this last weekend and I waited until the morning we were leaving to start making the diapers-then my machine stopped working so I ended up with 5 fitted diapers and 3 hour glass diapers.  I also am finding it challenging to know what type of diapers to make because I didn't know what kind I wanted until I tried a few different styles out with Colby.  For the diapers I used some recieving blankets I got at a rummage sale for a few cents, an old pair of flannel pants, and some cute fabric from JoAnn when they had flannel super cheap.  I used the pattern Wee Weka from here.  Colby out grew these diapers at about 4 months but they are soooo cute. 


Monday, December 12, 2011

DIY Card Wreath

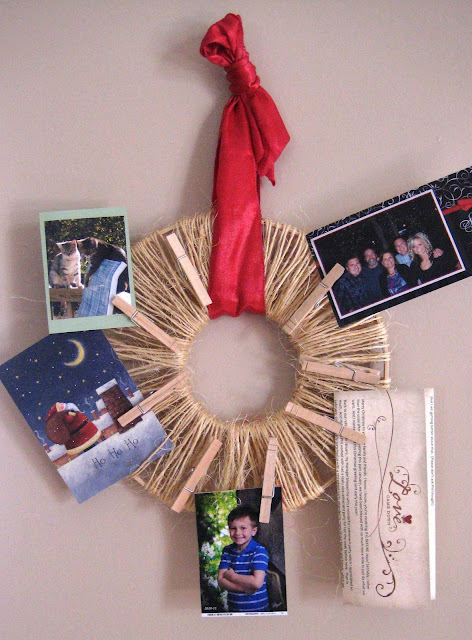
I finally got around to making a wreath, I've had the components for a few weeks now so I'm relieved to have it finally done and crossed off my list.  Originally I was just going to make the wreath with one embroidery hoop but I thought it looked to skimpy and thin so I decided to add in a smaller hoop to make it actually look like a wreath.  I also had a terrible time with the bow, at first I tried to tie a regular bow with two big loops, but after searching google for tips and untying and tying it numerous times this is what I ended up with.  It was quite simple to make.


1.  Get two hoops of varying sizes.
2.  Using twine tie it to the top of the big hoop then weave it in and out of the little hoop.  The first wrap the twine was really spread out, just so I could get the little hoop positioned in the center.
3.  Continue around the hoops filling in the gaps until it looks pleasing to your eye.
4.  Tye a bow, or at least try to.
5.  Place clothespins in the twine.  I didn't use glue I just kind of got the clothespins tangled up so they can be repositioned depending on how many pictures/cards I have. 
6.  Enjoy.


Friday, December 9, 2011

Homemade Gift Ideas for Babies

It seems now that I have a little one and I have 4 nephews and nieces I find myself drawn to the little handmade things.  I finally got a niece last March so I'm looking forward to trying my hand at frilly skirts and dresses. 


One thing that I don't leave the home without is my diaper pack in my purse.  Unfortunately I just have an ugly Pampers one I got for free, so I'm looking forward to trying this one out.  Tutorial Here


Colby tends to make a mess at every meal so I can imagine new parents would love some of these large 'baprons' these are a hybrid of an apron and a bib.  The fabric choices could be endless and I look forward to gifting some of these. Tutorial Here

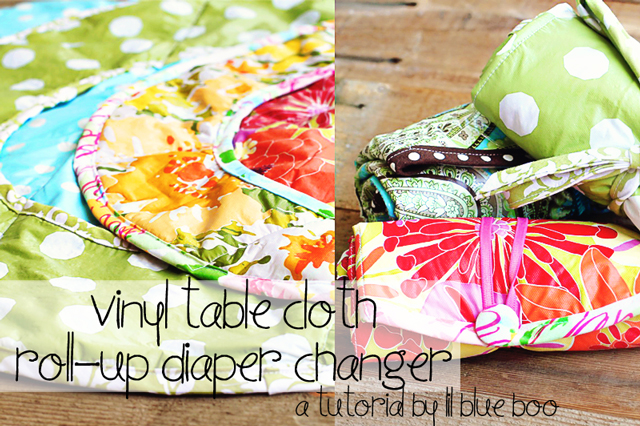
Another necesity I have found when we are out and about is a changing pad.  Those fold down changing tables frighten me and I can't imagine how many germs are floating on its tan textured plastic, ick.  Tutorial Here


For the older toddlers some bathtub crayons would be a blast.  I tend to think that the time in the warm sudsy water is one of Colby's favorite time of day.Tutorial Here

Good old Martha, she's always got such great ideas, or at least her staff does.  What little kid couldn't use another stuffed animal.  I love the ears and contrasting fabric. Tutorial Here


Thursday, December 8, 2011

Gifts for the Sewer

I always have a hard time buying presents for my family because I tend to be more on the practical side:  sure those slipper are pretty, but they've got three pairs they don't wear, so it makes it very difficult to gift.  Many of the ladies are also very big on sewing and crafting so I've run across a few good ideas for gifting.

Tutorial Here


This one is not only pretty, but practical as well since you can store buttons and odds and ends down below. (free)


Amazon.com


I just got this book from my good friend and I love it!  There are so many great patterns and bag ideas.  It explains how to make pockets, do lining, and everything else.  I'm excited to start my bag making. ($17.00)


amazon.com


This BurdaStyle book looks great and looks like it has some great ideas on clothes making.  I'm sure it would just add to my long list of projects to do, but I'm willing to sacrifice that to have the book.  (20.00)


Find them Here  (best for the beginner sewer)


These sewing sissors would be great for the sewer just starting out.  My mom gave me a pair shortly after graduating college and I love them.  They make cutting fabric a breeze, and they look really scary so you can defend yourself if you ever get burglarized while you are sewing. ($27.00)

Wednesday, December 7, 2011

Gift Ideas for the Women in Your Life

Year after year our family has slowly moved away from spending money on Christmas gifts.  Usually we just buy or make something small for each family.  Last year we just got board games for my siblings' families.  This year I'm still torn on what to make but the females in my family always seem to be running cold so I think some hand warmers and tissue holders would be welcome. For Something pretty I really want to try making a beautiful bracelet as well.  Once again, a million projects but nothing made yet, looks like I need to spend less time acquiring ideas from Pinterest and just make what I've got already.  So many ideas, so little time. 
Here's the Tutorial
Example Comes from Here
Tutorial Here

Tuesday, December 6, 2011

DIY Christmas Wreaths

Well, I have been in such a creative funk lately.  I think with the snow storms I have this urge to just wrap myself in a blanket and throw in a movie, but alas, with a ten month old that only happens after eight o'clock, so I have been spending my time chasing him around and preventing him from eating cords, dog food, and leaves.  What fun!   I have so many project ideas to do and I just need to start the sewing machine up.  For now though, I'll just add to my long list of projects to do.

Tutorial Here


Tutorial Here
Tutorial Here
Tutorial Here
Tutorial Here

Monday, December 5, 2011

Silly Pictures

So I've been working with Paint for some reason and am just starting to figure it out a bit.  This month I'm trying to send a picture a day to Colby's grandparents as a Christmas present.  I took these of Colby playing with a Cabbage Patch Doll and when I reviewed them I thought they would make a funny collage.  Happy Monday to you all!


Friday, December 2, 2011

Homemade Butterfingers


Hmm, these tasted really great but I must say the final product looked terrible because I tried to melt the chocolate chips to quickly so it got chunky,  so that is why I don't have a picture.  I got the recipe from Pinterest and had to try them.  Here's the original recipe.

Ingredients:
1 bag or candy corn
1 cup of peanut butter
Chocolate for coating

1.  Melt candy corn in bowl in microwave.  This took a few minutes but stir it periodically until it is smooth. 
2.  Add peanut butter and stir until smooth. I microwaved it a bit (30 seconds) until the peanut butter got a bit melty as well. 
3.  Place in greased 9x9 pan.  Let cool.
4.  Cut into bar size and coat with chocolate.  Eat.

Thursday, December 1, 2011

Infant Sensory Wall

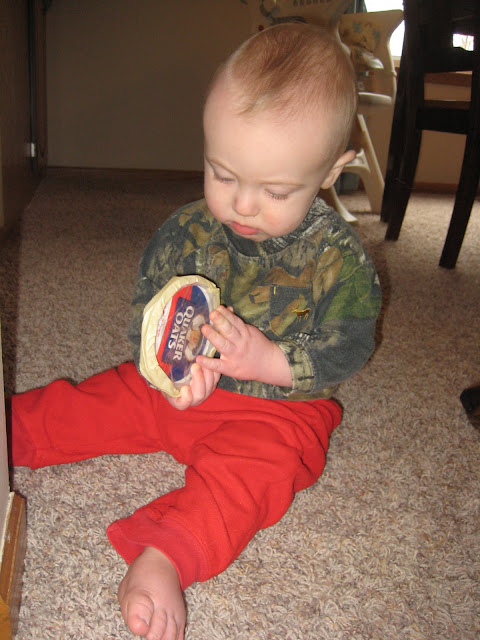
So I've been struggling with the feeling that I am some how failing as a mother and should be working harder to stimulate Colby's brain.  I suppose it is partially my fault since I read lots of parenting books and a brain enrichment book.  I know deep down that just the fact that I worry about him means that I am probably doing just fine.  I also have heard of a few people having their kids in Montessori preschools and day cares.  From what I can gather these basically just involve getting the kids involved outdoors, textures, tastes, and talking through your day with them.  I thought I would give my hand at stimulating his brain with sticky textures.  He seemed to like the wall and the dog also liked the challenge of pulling things off.  (I taped up contact paper sticky side up to the wall under a counter and then I taped some strips of clear tape on the other sheet.  Many different objects stick to these and I taped tape sticky side out onto a oatmeal lid and he was really perplexed by the lid getting stuck to his fingers)


Wednesday, November 30, 2011

Dehydrated Apples


Earlier this fall I picked a ton of apples off of my neighbor's tree.  He was just going to throw them out since there were way more than he wanted.  After some research we decided that most likely it was a yellow delicious variety and they were really clean.  There were some spots from Asian Beetles, but I didn't find any worms at all.  Well, after freezing 4 bags of sliced apples for future pies, 3 pies, and a crisp I needed to use up the apples without going into a diabetic coma, so I decided to make some dried apples.  I googled it of course and it was recommended to use a food dehydrator because it would be  more energy efficient, but I didn't have one so I used my oven.   It took me about 6 hours from start to finish and I devoured all the dried apples within 3 days.  Yum.  Here's how I did it:

 1.  This nifty contraption is a life saver.  It peels, cores and slices the apples all at once.  It looks like a torture machine but was a great present from my dad a few years ago.  So I sliced and peeled the apples then placed them in a bowl with lemon water to prevent browning.


2.  I placed them on cookies sheets and sprinkled them with cinnamon.  There were a lot of variations from putting jello on to sugar, but they are delicious just with cinnamon. 


3.  Then I put them in my oven set at 150 or so with the door open.  I revolved the pans of apples around the oven and flipped the apples about every half hour. 


4.  It took my apples probably about 3 hours to get fully dehydrated.  They are done when they are bendy like leather but don't have moisture beads in them when they are torn. I stored mine in a bowl and as I said they were gone within a few days-but they should keep for several months if stored in a sealed container in a dry, cool place.